Buckling, loose panels, exposed nails, uneven courses, water stains, and siding that cannot move may indicate an incorrect installation. Learn the most common signs of poor vinyl siding workmanship and when repairs require professional inspection.
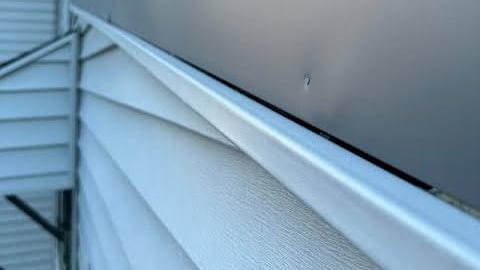
Vinyl Siding Installation Inspection Guide
```How to Tell if Your Siding Was Installed Incorrectly
Incorrectly installed vinyl siding may look acceptable when the project is first completed. Problems often become more noticeable after strong winds, seasonal temperature changes, heavy rain, or several years of normal weather exposure.
```Warning signs can include buckled panels, uneven courses, loose siding, exposed fasteners, open seams, water stains, and trim that does not properly receive the panel edges. Some issues are cosmetic, while others can affect wind resistance, drainage, flashing, and the condition of the wall behind the siding.
```Vinyl siding should be installed as a coordinated exterior system. The panels, starter strip, fasteners, corner posts, J-channel, utility trim, water-resistive barrier, flashing, soffit, fascia, and mounting blocks must work together.
```The Most Important Principle: Vinyl Siding Must Move
```Vinyl siding expands as temperatures rise and contracts as temperatures fall. Proper installation supports each panel while allowing it to move horizontally.
Industry installation guidance is based partly on ASTM D4756 and directs installers to follow current manufacturer instructions and applicable local requirements. Those instructions address substrate preparation, fastening, panel movement, accessories, soffit, fascia, and special exterior details.[1][2]
Many visible siding problems begin when the panels are nailed tightly, stretched during installation, cut without enough clearance, or forced into trim that is too shallow.
```Common Signs of Incorrect Siding Installation
```| Warning Sign | Possible Installation Problem | Why It Matters |
|---|---|---|
| Buckled or wavy panels | Overdriven fasteners, tight panel ends, or an uneven substrate. | Restricted movement can distort panels and weaken locks. |
| Loose or rattling siding | Missing fasteners, broken locks, poor starter-strip attachment, or incomplete engagement. | Loose panels may become more vulnerable during high winds. |
| Uneven horizontal courses | Starter strip installed out of level or panels stretched during installation. | Small errors at the bottom can become more visible higher on the wall. |
| Exposed nails or screws | Face-fastening used instead of the panel’s designated nailing slots. | Visible penetrations can restrict movement and create potential water-entry points. |
| Water stains or rot | Missing flashing, damaged housewrap, reverse laps, or blocked drainage. | Moisture can damage sheathing, insulation, trim, and framing. |
Warning Sign 1
```The Siding Is Buckled, Wavy, or Rippling
Vinyl siding should generally create a consistent wall surface. Minor variations can reflect the framing or sheathing underneath, but pronounced waves and buckles may indicate that the panels cannot move properly.
Fasteners driven tightly against the nailing hem can pin the siding to the wall. Panels cut tightly between corner posts or J-channel may also push outward as they expand.
Replacing only the visibly warped panel may not solve the problem. The fastening pattern, panel clearances, trim depth, and condition of the substrate should be checked first.
```Warning Sign 2
```The Panels Cannot Slide Side to Side
A properly installed panel should normally have some ability to move horizontally when it is not constrained by surrounding details.
If a panel feels completely rigid, it may be over-nailed, face-fastened, glued, sealed into the trim, or cut too tightly.
This simple field observation does not replace a full inspection, but it can reveal an installation that is restricting normal expansion and contraction.
```Warning Sign 3
```Nails Were Driven Too Tightly
Vinyl siding fasteners should support the panels without clamping them firmly against the wall. Overdriven nails prevent movement and can pull or distort the nailing hem.
Tight fasteners may lead to ripples during hot weather and stress cracks during colder conditions. The damage can also weaken the connection between courses.
Correcting the problem may require unlocking several courses so the fasteners can be removed and reinstalled according to the siding manufacturer’s instructions.
```Warning Sign 4
```Fasteners Are Missing, Crooked, or Poorly Positioned
Fasteners should be installed through the designated slots using the type, spacing, and penetration specified for the siding system.
Nails driven at an angle, placed outside the slots, spaced too far apart, or installed into an unsuitable substrate may not provide reliable support.
Improper fastening is especially concerning at outside corners, upper stories, gables, and other areas exposed to strong wind pressure.
```Warning Sign 5
```The Siding Keeps Blowing Loose
Strong wind can damage a correctly installed system, but siding that repeatedly loosens in moderate weather may indicate an installation defect.
Possible causes include incomplete panel engagement, broken locking edges, too few fasteners, weak substrate attachment, improper starter strip, or panel ends that do not remain inside the receiving trim.
Industry guidance emphasizes that vinyl siding must be properly selected and installed to achieve its intended wind performance.[3]
```Installation Details to Check After Repeated Wind Damage
```- Starter-strip attachment and alignment
- Continuous engagement between siding courses
- Fastener type, spacing, position, and penetration
- Panel clearance inside corners and channels
- Condition of the locking edges
- Receiving depth of J-channel and corner posts
- Condition of the sheathing or fastening substrate
- Product suitability for the wall and wind exposure
Warning Sign 6
```Horizontal Courses Are Not Level
The first course establishes the alignment of the entire wall. If the starter strip is not level, each course above it can follow the same error.
Uneven courses may rise or fall toward a corner, window, garage door, or roofline. Installers sometimes try to correct the problem by stretching or compressing later panels, which can make the siding look distorted.
The most dependable correction may require removing siding down to the point where the alignment problem began.
```Warning Sign 7
```Panel Seams Are Stacked or Highly Visible
Siding-panel overlaps should be arranged according to the manufacturer’s instructions and planned so the wall has a balanced appearance.
Seams placed directly above one another can create noticeable vertical lines and concentrate movement in one section of the wall.
Overlaps that face the primary viewing direction may also appear more visible. Poorly fitted seams can separate as temperatures change or allow wind to catch the panel ends.
```Warning Sign 8
```Panel Ends Are Too Tight or Too Short
Siding needs room to move inside corner posts, J-channel, lineals, and other receiving accessories.
Ends cut too tightly may push against the trim and cause buckling during warm weather. Ends cut too short may pull out of the channel when the vinyl contracts.
Required clearances vary with the product, panel length, installation temperature, and manufacturer specifications. Generic measurements should not replace the instructions for the actual siding system.
```Warning Sign 9
```The Wrong Trim or Accessory Was Used
Standard J-channel may not be deep enough for insulated siding, specialty profiles, shakes, or other thicker products. Utility trim, starter strip, corner posts, and mounting blocks must also be compatible with the selected siding.
A receiver that is too shallow can compress the panel and restrict movement. An oversized or poorly positioned channel may leave siding loose or create inconsistent shadow lines.
ASTM D3679 directs users to install qualifying rigid PVC siding according to ASTM D4756 and the specific product manufacturer’s instructions.[4]
```Warning Sign 10
```Exposed Nails or Screws Were Driven Through the Panel Face
Visible fasteners through the face of the siding are often a sign of an improvised repair or incorrect installation.
Face-fastening can restrict panel movement and leave visible holes. It may also lead to cracking around the fastener as the vinyl expands and contracts.
Certain specialized details may use manufacturer-approved fastening methods, but ordinary horizontal panels should not be face-nailed as a shortcut.
```Warning Sign 11
```Siding Was Installed Over an Uneven Wall
Vinyl siding should be installed over a smooth, flat surface. Industry guidance identifies proper sheathing or backerboard preparation as a basic part of installation.[5]
Protruding nails, uneven sheathing joints, damaged boards, loose existing siding, and irregular framing can telegraph through the new exterior.
Siding should not be expected to hide significant structural or substrate problems. The wall should be properly prepared before panels are installed.
```Warning Sign 12
```Window and Door Trim Looks Improvised
Siding around windows and doors should terminate inside compatible J-channel, lineals, casing, utility trim, or manufacturer-approved accessories.
Uneven cuts, exposed panel edges, oversized caulk joints, loose trim, and face-fastened pieces can indicate that the opening was not planned before siding installation.
Trim is not a substitute for flashing. A window can look neatly framed while the concealed sill, jamb, or head-flashing detail remains incomplete.
```Warning Sign 13
```Water Stains Appear Around Windows, Doors, or Rooflines
Water stains do not prove that the siding panels were installed incorrectly, but they can indicate a flashing or drainage-plane failure connected to the siding project.
Common problems include missing sill flashing, reverse-lapped housewrap, incomplete head flashing, missing kick-out flashing, improperly detailed utility penetrations, and sealant blocking intended drainage.
The inspection should extend above and around the visible stain because water can travel along sheathing, flashing, and framing before it becomes visible.
```Signs of a Possible Water-Management Installation Error
```- Interior stains below windows or exterior doors
- Rot around window trim, decks, or roof intersections
- Musty odors near exterior walls
- Wet or stained sheathing behind removed siding
- Missing kick-out flashing at the end of a roof
- Housewrap seams that direct water inward
- Utility fixtures installed without proper mounting blocks
- Excessive caulk sealing the bottom of drainage channels
- J-channel being used as the only protection around an opening
Warning Sign 14
```The Starter Strip Is Loose, Crooked, or Positioned Incorrectly
Starter strip anchors the first siding course and establishes the wall’s lower alignment. If it is loose, uneven, or improperly positioned, the bottom course may disengage or sit at the wrong angle.
A failed first course can allow wind to work behind the siding and loosen additional courses above it.
Reconnecting the visible panels without correcting the starter strip may allow the problem to return during the next storm.
```Warning Sign 15
```The Top Course or Panels Beneath Windows Are Loose
Siding beneath windows and at the top of a wall is often cut lengthwise, removing the original nailing hem or locking edge.
Utility trim, finish trim, snap-lock tabs, or another approved method may be required to secure the cut edge.
Loose top courses, visible face nails, or panels that fall away from the wall can indicate that the finishing accessory was omitted, positioned incorrectly, or not matched to the siding profile.
```Excessive Caulk Can Be a Warning Sign
```Sealant is useful at approved transitions, but it should not be used to glue panels together, fill large installation gaps, replace flashing, or seal every edge of the siding system.
Large caulk beads may conceal poorly cut panels, missing trim, reverse laps, or gaps around windows and doors.
Sealing the bottom of J-channel, mounting blocks, or other drainage points can trap water behind the exterior.
```Homeowner Inspection Checklist
```- View each wall from an angle and look for waves or bulges.
- Check whether accessible panels have limited side-to-side movement.
- Look for exposed nails, screws, or cracked face-fastening points.
- Inspect the bottom course and starter-strip connection.
- Look for crooked courses or stacked seams.
- Check panel ends at corner posts and J-channel.
- Listen for rattling or flapping during moderate wind.
- Inspect window, door, roofline, deck, and utility transitions.
- Look for stains, rot, soft trim, or musty odors.
- Photograph seasonal changes and recurring problem areas.
Some Movement and Noise Can Be Normal
```Properly installed vinyl siding is not attached rigidly like masonry or stucco. Some slight movement is intentional because the material needs to respond to temperature changes.
Occasional sounds during rapid heating or cooling do not automatically mean the siding has failed. The concern is repeated loud movement combined with buckling, loose panels, open seams, or visible distortion.
A professional inspection can distinguish normal material movement from fastening, trim, or substrate problems.
```Can Incorrect Siding Installation Be Repaired?
```Many installation problems can be corrected without replacing every panel. The required scope depends on how widespread the defect is and whether the siding remains flexible and reusable.
Targeted Repairs May Include:
- Refastening loose courses correctly
- Restoring expansion clearance
- Replacing broken panels or locks
- Correcting starter strip
- Replacing shallow or incompatible trim
- Repairing housewrap and flashing
- Correcting mounting blocks and penetrations
- Reinstalling loose soffit or fascia accessories
When Incorrect Installation Requires Replacement
```Broader replacement may be necessary when defects extend across several walls or the panels have been permanently damaged by restricted movement.
- Fastening errors are present across the entire exterior.
- Large areas are permanently warped or stretched.
- Panel locks are broken throughout the installation.
- Siding was installed over severely uneven or deteriorated sheathing.
- The drainage plane and flashing require extensive reconstruction.
- Surrounding panels crack during removal.
- Compatible replacement material is no longer available.
- Repeated repairs are no longer cost-effective.
```“Incorrect siding installation often reveals itself through movement. We look for panels that are pinned too tightly, ends that cannot expand, broken locks, loose starter strip, uneven courses, and water-management details that do not drain properly. The goal is to identify the cause before simply replacing the visible panel.”
```
Document Problems Before Repairs Begin
```Take wide photographs of each affected elevation and close-up images of fasteners, buckles, trim gaps, open seams, water stains, and loose panels.
Keep the original contract, invoices, product information, warranty documents, and communications with the installer.
Clear documentation can help establish whether the issue is isolated damage, a product concern, or a recurring workmanship problem.
```Request an Independent Siding Inspection
```When the original installer cannot explain or resolve repeated problems, an independent exterior inspection can provide a clearer assessment of the panels, accessories, substrate, flashing, and fastening.
The inspector may need to unlock or remove selected siding courses to see concealed fasteners and water-management details.
A visual inspection from the ground alone may not reveal overdriven nails, torn housewrap, missing flashing, or damaged sheathing.
```Concerned About Your Siding Installation?
```Buckling, loose panels, exposed nails, water stains, and repeated storm damage may indicate that the installation needs more than a surface repair.
Schedule a free siding inspection with Suburban Construction to identify installation concerns and discuss practical repair or replacement options.
```Standards and Technical References
```- Polymeric Exterior Products Association and the Vinyl Siding Institute, Vinyl Siding Installation Manual.
- ASTM International, ASTM D4756, Standard Practice for Installation of Rigid Poly(Vinyl Chloride) PVC Siding and Soffit.
- Polymeric Exterior Products Association, Vinyl Siding Installation Best Practices and Wind-Resistance Guidance.
- ASTM International, ASTM D3679, Standard Specification for Rigid Poly(Vinyl Chloride) PVC Siding.
- Gentek Building Products, Current Vinyl Siding Product and Installation Resources.
- Current installation instructions, technical specifications, accessory requirements, wind provisions, fastening details, and warranty terms published by the manufacturer of the installed siding.
Technical note: Siding movement, noise, appearance, and weather performance can be affected by installation, product design, wall framing, sheathing, temperature, wind, previous repairs, and concealed moisture conditions. This article provides general educational information and does not replace an on-site inspection, current manufacturer instructions, applicable building requirements, or professional building-envelope evaluation.
```Share This Post
Share it on Facebook or X, or send it through your device share sheet for Instagram.